

One of many necessary features of profitable software improvement is to create an efficient and intuitive consumer interface. Trendy data-oriented apps face the issue of constructing an efficient consumer interface shortly, with out endeavor advanced steps. On this article – we current a brief tutorial on the way to make the most of Streamlit to create a profitable net software.
Streamlit is an effective selection for builders and groups which are well-versed in information science and wish to deploy AI fashions simply, and shortly, with just a few strains of code.
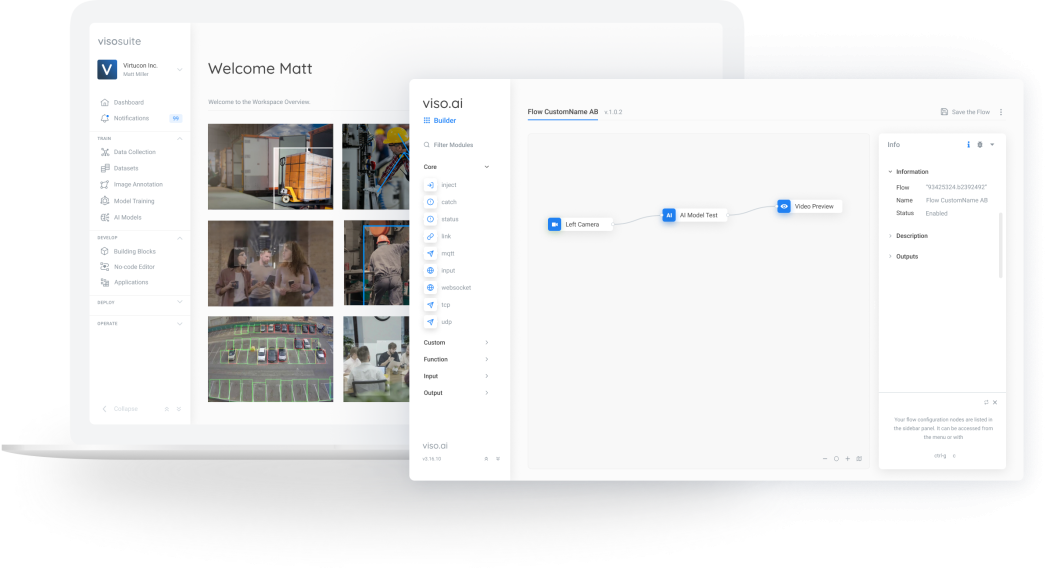
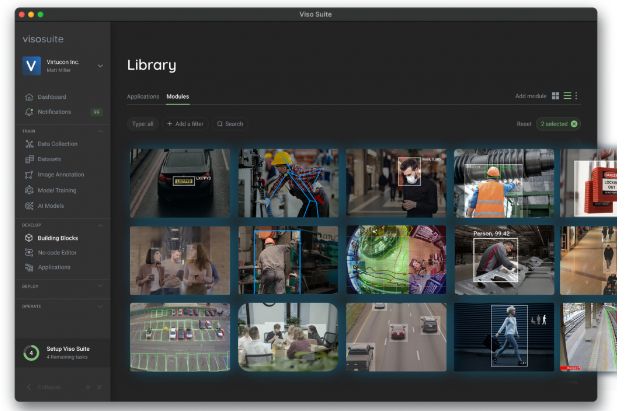
About us: At viso.ai, we’ve constructed the end-to-end machine studying infrastructure for enterprises to scale their laptop imaginative and prescient purposes simply. Viso Suite doesn’t simply cowl mannequin coaching however extends to your complete ML pipeline from sourcing information to safety. To be taught extra about Viso Suite, guide a demo.
What’s Streamlit?
Streamlit is a Python-based library particularly developed for machine studying engineers. It’s an open-source, free framework that enables the short creation and sharing of handsome machine-learning net purposes.
Laptop imaginative and prescient and machine studying specialists usually are not net builders. They will’t spend months studying to make use of frameworks for constructing net apps. As an alternative, they need a software that’s straightforward to be taught and use, i.e. can effectively show information and gather wanted parameters for modeling. Streamlit permits them to create a great-looking software with only some strains of code.

You could find directions on the way to set up Streamlit on Home windows, Linux, and macOS here. It additionally gives GitHub code-space.
Why is Streamlit helpful in Machine Studying?
Machine studying extracts hidden info and insights from huge information utilizing statistical strategies and strategies. After performing the information mining course of, the subsequent step is information visualization. It is going to help the customers and executives in figuring out necessary info that’s extracted from information.
Typically, machine studying outcomes generate numerous information with out offering clear insights. To facilitate information visualization, it’s essential to have a visualization software. It may possibly create an interactive show to make it simpler for customers to make use of.
Streamlit is straightforward to be taught, particularly for individuals with no front-end information to place their code into an internet software:
- It requires much less code to create handsome net apps.
- It accelerates the computation pipeline by utilizing information caching.
- You don’t want front-end (HTML, CSS, JavaScript) expertise.
- You gained’t want months to create an internet app, you’ll create a machine-learning app in just a few hours.
- Streamlit is suitable with most Python libraries (e.g., matplotlib, seaborn, pandas, Plotly, Keras, PyTorch, SymPy).
The way to Run Streamlit: Fingers-on Options
Displaying Textual content
Streamlit possesses these capabilities for textual content show:
- st.write – accepts a number of arguments and datatypes and shows them on the display. Instance:
st.write ("Good day, how are you doing? ")
- st.title – units and shows the title of an software. Instance:
st.title ("That is the applying title")
- st.textual content(“Text1”) – shows fixed-width and preformatted textual content.
- st.header(“Header1”) – units header within the textual content.
Displaying Photographs, Audio, Video Recordsdata
With Streamlit, you possibly can show photographs, audio, and video information with its capabilities. As an example, the perform to show a picture is:st.picture(picture, caption=None, width=None, use_column_width=None, clamp=False, channels="RGB", output_format="auto")
For instance: import streamlit as st
st.picture(mountain.jpg', caption='Mountain panorama')

- st.audio(information, format=”audio/wav”, start_time=0, *, sample_rate=None) – perform that shows audio information.
- st.video(information, format=”video/mp4″, start_time=0, *, subtitles=None) – perform that shows video information.
Enter Widgets in Streamlit
Streamlit gives completely different widgets you can plug immediately into your apps, akin to buttons, sliders, textual content inputs, and many others.:
- st.button() – perform that shows a button widget.
- st.radio() – perform that shows a radio button widget.
- st.checkbox() – perform that returns a Boolean worth. When checked, the field returns a True worth, in any other case a False worth.
- st.selectbox() – perform that shows a choose widget, to be able to allow the consumer to pick an merchandise.
- st.multiselect() – perform that shows a multiselect widget.
- st.slider() – perform that shows a slider widget, e.g. a spread slider that helps int, float, date, time, datetime varieties.
- st.number_input() – perform that shows a numeric enter widget.
- st.text_input() – perform that shows a textual content enter widget.
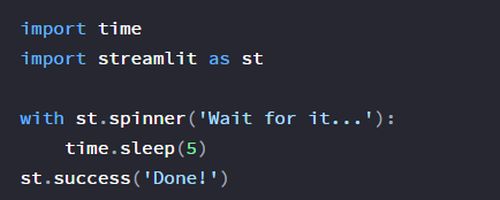
Displaying App Progress and Standing
Streamlit also can show the progress and the success standing of your app.
- st.progress() – perform that shows a progress bar.
- st.spinner() – perform that shows a brief ready message throughout execution.
- st.success() – perform that shows successful message.
- st.error() – perform that shows an error message, e.g. a pop-up window.
- st.warning () – perform that shows a warning message.
- st.data() – perform that shows an informational message, e.g. through pop-up window.
- st.exception() – perform that shows an exception message.
Sidebar and Container in Streamlit
The order and association of pages in your app can have a big impression in your consumer expertise. By effectively arranging your content material, guests will perceive and navigate your website higher. Consequently, they’ll be capable of discover what they’re on the lookout for and that can improve the consumer expertise. To arrange your app with Streamlit – you possibly can create a sidebar or a container in your web page.
- st.sidebar() – creates a sidebar in your app interface and places components inside. Due to this fact, you’ll make your app extra organized and straightforward to know.
- st.container() – creates an invisible container the place you possibly can put components to create a helpful association and hierarchy.
import streamlit as st
with st.container():
st.write("That is contained in the container")
# You possibly can name any Streamlit command, together with customized elements:
st.bar_chart(np.random.randn(50, 3))
st.write("That is exterior the container")
Displaying Graphs and Visuals
Knowledge visualization helps customers to know information shortly and precisely, unveiling the traits and outliers. The information and the visuals ought to work collectively, to supply good evaluation and correct decision-making.
The visualization instruments give us a transparent concept of what the knowledge means by offering visible context via maps or graphs. Streamlit gives the ability of visualization with its capabilities:
st.pyplot() – perform that shows a matplotlib.pyplot determine.
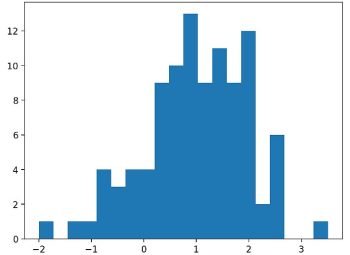
For instance – the next code shows the graph above.
import streamlit as st
import matplotlib.pyplot as plt
import numpy as np
arr = np.random.regular(1, 1, dimension=100)
fig, ax = plt.subplots()
ax.hist(arr, bins=20)
st.pyplot(fig)
Create a Machine Studying App
First Steps – Making ready Folders and Session state
Medium-size Streamlit initiatives are just like most Python initiatives. Due to this fact, you possibly can arrange the information and folders as a pure Python venture.
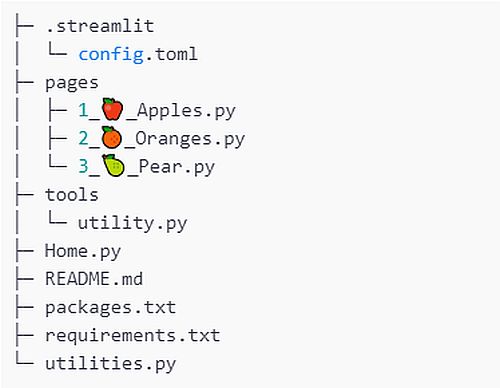
- Create a further src/<venture>/ui folder – to place many of the capabilities/.py information. These capabilities (supply information) name Streamlit to show enter/outcomes for different strategies of the package deal.
- For an software with a number of pages – you possibly can create a separate .py file per UI web page.
- You possibly can create a ui.py on the venture degree which acts as the principle entry level for the Streamlit app. After that, you utilize capabilities within the ui module to entry the package deal.
You possibly can make the most of Session State to retailer variables throughout reruns, create occasions on enter widgets, and use callback capabilities to deal with occasions. This highly effective functionality permits app creation that may:
- Assist Pagination
- Carry out information/picture annotation
- Add widgets that depend upon different widgets
- Construct easy stateful video games like Battleship, Tic Tac Toe, and many others.
You could find extra details about the Streamlit session state here.
Configuring Streamlit Apps
Streamlit gives 4 other ways to configure your app. To view all accessible configuration choices – you possibly can run the next command:
streamlit config present
Right here we current the configuration listing by order. Whenever you make the identical configuration choices a number of occasions, you then set command line flags earlier than the surroundings variables.
- Within the world config file at ~/.streamlit/config.toml for macOS/Linux or %userprofile%/.streamlit/config.toml for Home windows:
[server]
port = 80
- In a per-project config file at $CWD/.streamlit/config.toml, the place $CWD is the folder you’re working Streamlit from.
- By utilizing STREAMLIT_* surroundings variables, akin to:
export STREAMLIT_SERVER_PORT=80
export STREAMLIT_SERVER_COOKIE_SECRET=dontforgottochangeme
- As flags on the command line when working Streamlit run:
streamlit run your_script.py --server.port 80
If you happen to make adjustments to .streamlit/config.toml whereas the app is working, it is best to restart the server, so the adjustments will likely be mirrored within the app.
Growing a Machine Studying App
Utilizing Streamlit you possibly can develop various kinds of ML apps, akin to for information analytics, traits, forecasts, and many others. On the homepage, you possibly can show a abstract of the information that you just select. As well as, the Exploration web page would will let you visualize variables in plots.
The Prediction web page can include variables with a Predict button that can estimate the principle variable development. There is usually a sidebar that can will let you choose a web page. It is best to cache the information often in order that it doesn’t reload continuously.
- You possibly can retailer your variables in a dictionary by using get_value(val, dict1) and get_fvalue(val) capabilities for dictionaries.
- After that, the enter – you possibly can retailer the consumer’s enter in a listing named feature_list after which in a NumPy variable named single_sample.
- Then, it is best to load your saved RandomForestClassifier mannequin in loaded_model and its prediction, which is 0 or 1 (classification downside).
- The .gif information needs to be saved in file and file_. Due to this fact, primarily based on the worth of the prediction, you’ll have two instances, “Rise” or “Fall” on your development prediction.
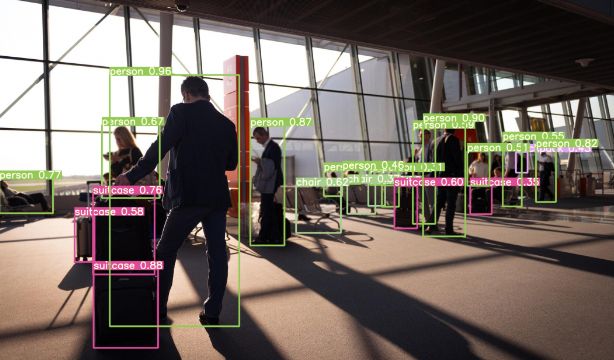
Growing an Picture Classification App
For this function, you should add and course of information in Streamlit. You possibly can add various kinds of picture information (.jpg, .png), in addition to different information akin to CSV information, and many others.
To implement picture classification, you possibly can make the most of a pre-trained TensorFlow Hub mannequin to construct an software that may determine an individual in an workplace. For this software, you’ll want the next packages:
- `streamlit` – as a foundation
- `pillow` – to resize the picture that the consumer will add
- `matplotlib` – to show the picture
- `tensorflow_hub` – to load the pre-trained mannequin
- `numpy` – to broaden the size of the picture
This software could have two major capabilities:
- major perform – permitting the consumer to add a picture
- prediction perform – working inference on the uploaded picture
In the principle perform, you should utilize `header` to set the applying heading as seen earlier. Then, it is best to use `st.file_uploader` to let the consumer add a picture. Additionally, you possibly can specify accepted file varieties within the file uploader. After importing the picture, `Picture` from Pillow is used to open it. Subsequent, you run the prediction perform show the consequence, and plot the picture beneath the consequence.
Inside the prediction perform, there are some things that you should do:
- Load the pre-trained mannequin from TensorFlow Hub
- Resize the picture uploaded by the consumer to the required dimension (the mannequin require a 300 x 300 picture)
- Convert the picture to an array and standardize it
- Embrace the batch dimension within the picture dimension (for a single picture, the batch dimension is 1)
- Run predictions and map them to class names
Deploying the App
You deploy your software by copying, configuring, and enabling it to a particular major URL. Consequently, once you full the deployment course of, the applying will change into publicly accessible on the bottom URL
To deploy the Stremlit app – it is best to undertake the next steps:
- Create a brand new repository in GitHub and add your venture information there.
- Create a brand new file named ‘necessities’ the place it’s important to put the libraries you utilized in your app.
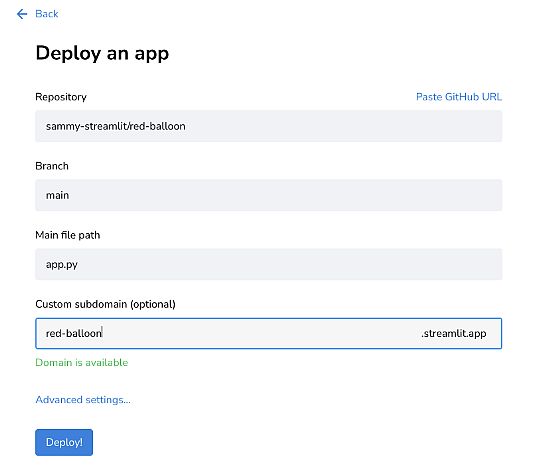
- Enter your repo, department, and file path. As a shortcut, you may also click on “Paste GitHub URL” to stick a hyperlink on to your_app.py on GitHub. An app URL with a random hash is prefilled, nonetheless you may also change this to a customized subdomain.
- Press the Deploy
- You possibly can make the most of Superior Deployment settings (optionally available) – in case you might be connecting to an information supply or wish to specify the Python model on your app.
What’s Subsequent?
To be taught extra about laptop imaginative and prescient and entry extra guides and tutorials, try our different articles: